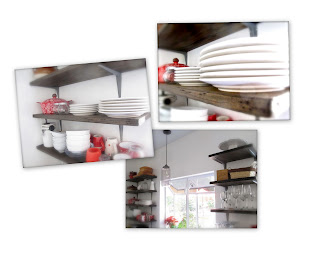
I worked in our garage - you will need a big working table and a well ventillated space . First, use sandpaper or sanding machine on every side of the wood to make it clean and smooth... Then the fun part begins when we distress the wood. If you check out old wood shelves the first thing you might notice is that there are no sharp edges. What the time did to the wood we do this with hammer: hit the edges, make them round and uneven... After that use nails, fork, sharp knife... whatever you find around you to make the wood "worn out". You can not make a mistake - hit, scratch the surface... have fun but don't overdo it and try not to make patterns - which can give the unwanted fake look to the wood. When you finished, wipe the surface - make sure it is clean. Read the instruction of the stain. Cover your table (you might use four posts to elevate your wood for easier painting). With your brush paint one side of the shelf - then you must wait a certain amount of time (depends of how dark you want the color be) then use the rag cloth and wipe the stain away. But be careful (I messed up it first time) - always wipe in one direction!
I only used one coat of stain. I let one side completely dry before i moved to the next side. The stain play up the wood scraches nicely - look so cool!:)
You can use any kind of shelf bracket - modern, country, vintage... I choose the simpliest Home Depot kind because I wanted an industrial look - and I'm very happy with the result!:) I hope that you like it too - let me know if you have any questions!


2 comments:
Oooh I really appreciate all the work that went into this! The end result is gorgeous: rustic but modern all at once.
Thanks for all the details!
Popping over from the EBT...
Thank you Melissa for stopping by and for your nice comment!:)
Post a Comment